Front Page Settings
Go into your app and then into your alarm system.
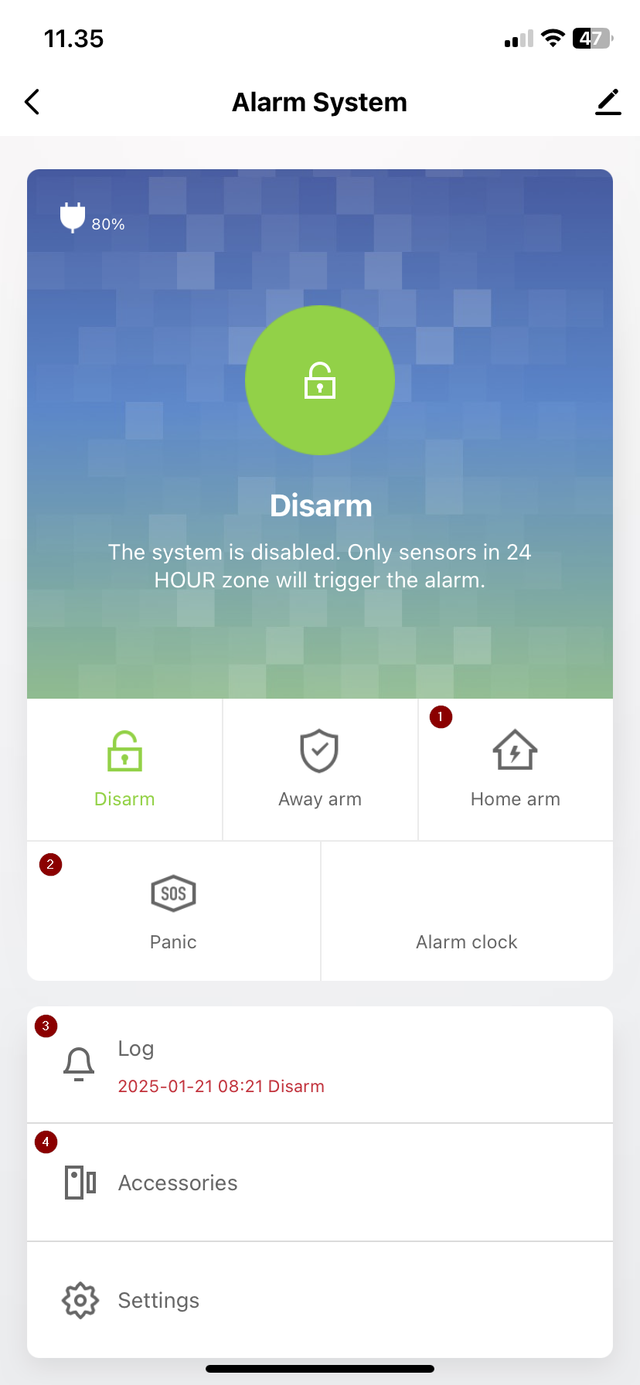
Here, you will be introduced to a menu of different functions, including adding and disarming your alarm.
- You can set it to a "home arm," which allows you to move freely at home, but the alarm will trigger when doors or windows are opened.
- You can also make an SOS call or use the alarm function.
- If you go to the front page of your alarm system, there is a section called "log." Here, you can see previous activities of when the alarm was armed and disarmed.
- Under "Accessories," you can add new accessories, including those you’ve already added, as well as sensors, remote controls, and sirens.
Naming the Alarm and Location
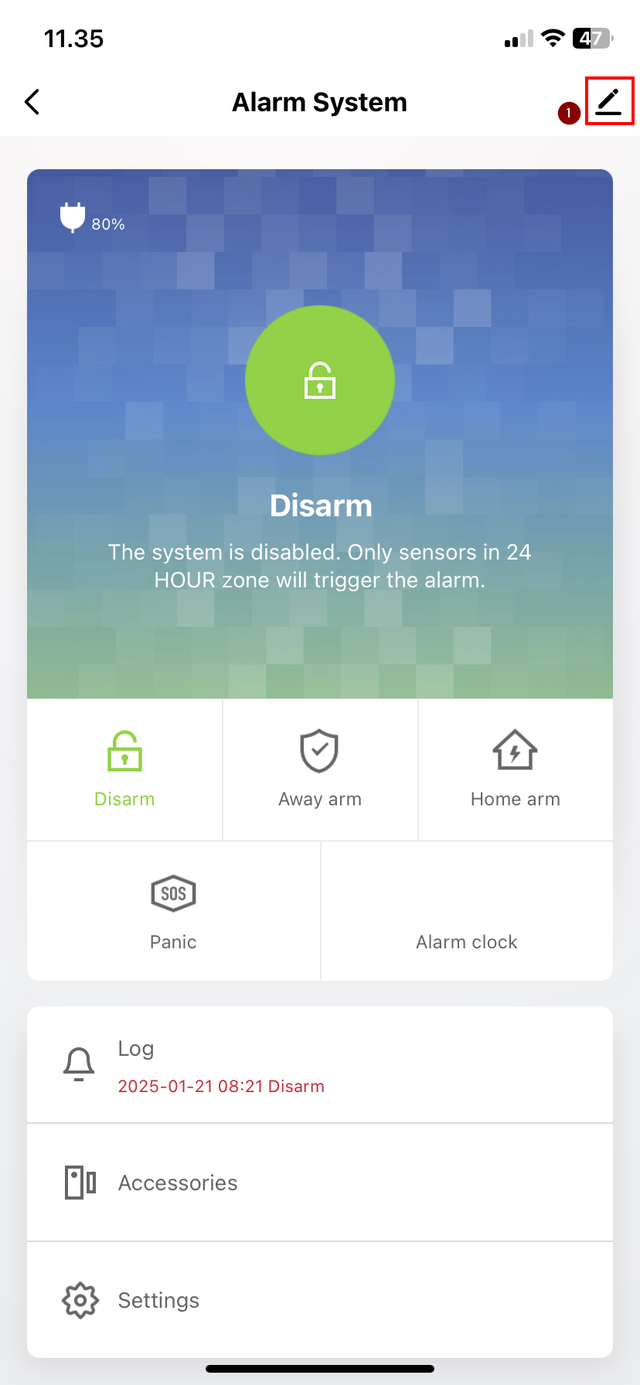
1. In the top right corner, you will find a small pencil icon. Tap on it to access further settings.
2. Inside, you will find another pencil in the top right corner. Here, you can name your alarm and assign it a location.
3. In the settings, you can also choose to share your device with someone else.

Alarm Settings and Explanations
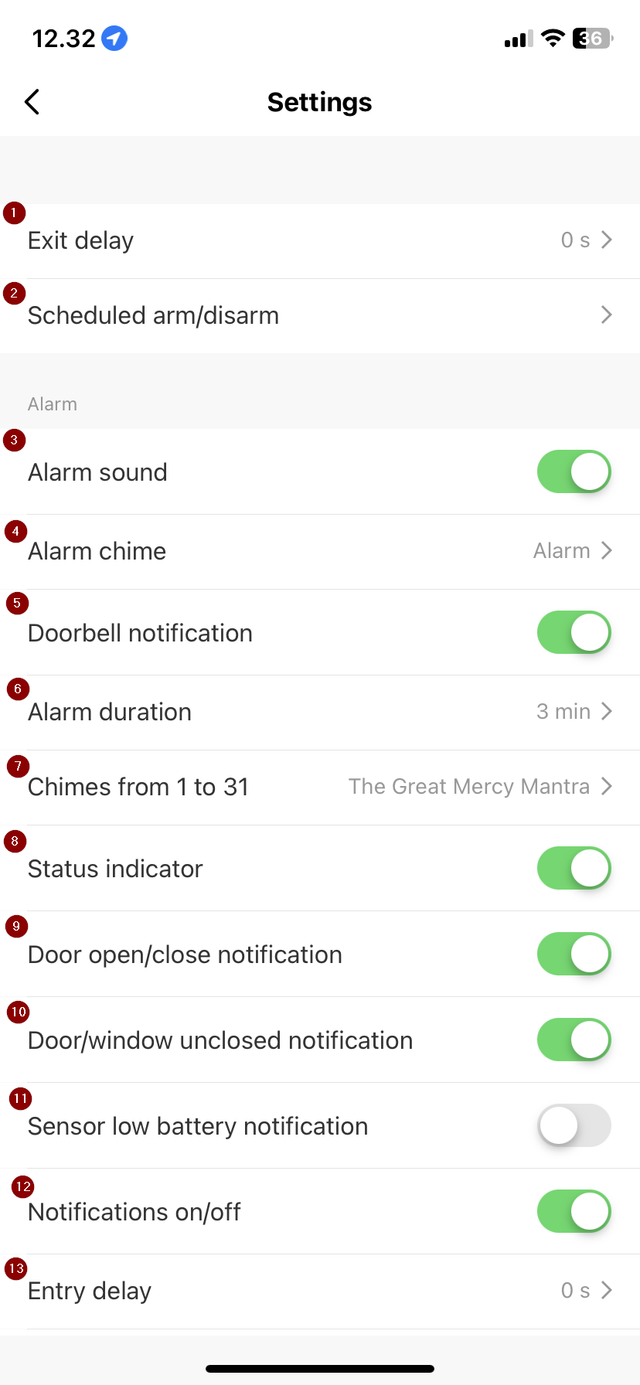
- At the bottom, you can find "Settings." At the top of the page, you will find "Exit delay," where you can set a delay from 0 to 300 seconds, allowing you time to leave the room before the alarm activates.
- The next setting is "Scheduled arm/disarm." Here, you can select a time for your alarm to arm itself, as well as when it should disarm automatically.
- Under "Alarm sound," you can turn this off if you don't want the alarm to make a sound when it activates but instead just send you a notification.
- "Alarm chime" allows you to select a tone for your alarm when it goes off.
- "Doorbell notification" will send you a notification when your doorbell is used.
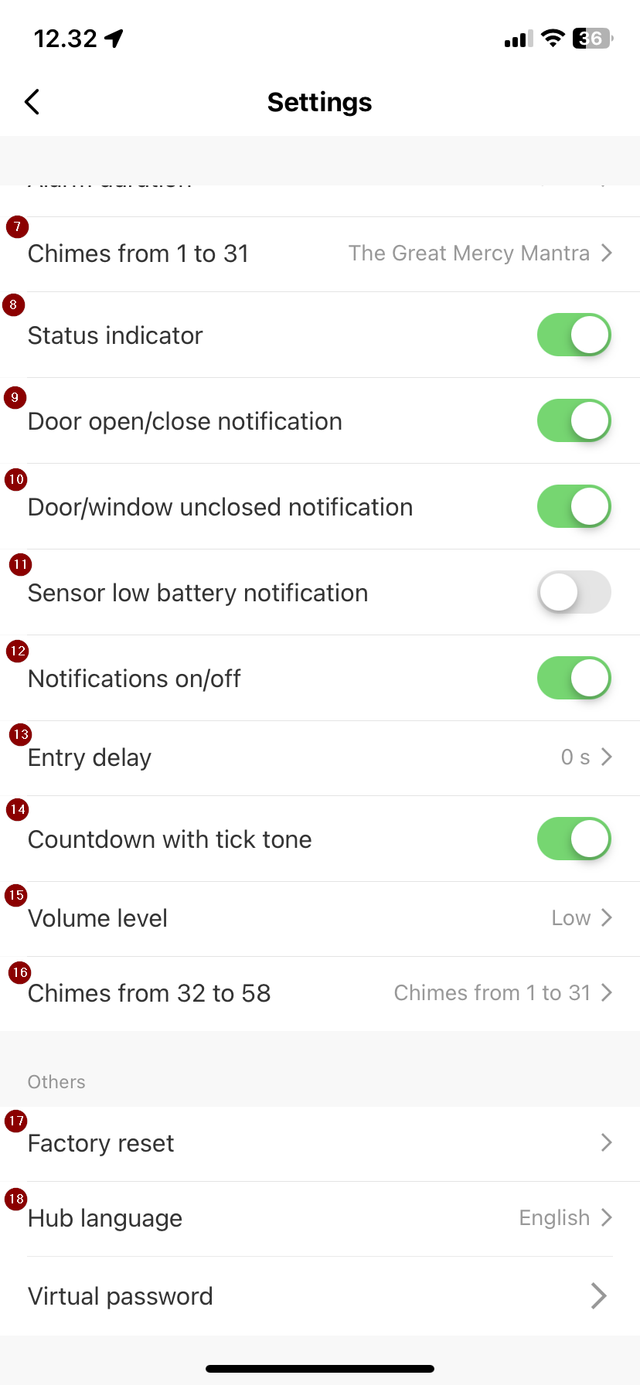
- "Alarm duration" lets you choose how long your alarm sound will last once it goes off. You can choose between 1 second and 59 minutes.
- "Chimes from 1 to 31" lets you select from 31 different tones for your alarm when the feature to detect door openings is enabled.
- "Status indicator" will show a red ring around your alarm system when it activates.
- "Door open/closed" sends notifications when the door is opened or closed, if enabled.
- "Door/window unclosed" sends notifications if a door or window isn’t closed.
- "Sensor low battery" sends a notification when your sensor’s battery is low.
- "Notifications on/off" lets you turn notifications on or off, depending on whether you want to receive them.
- "Entry delay" lets you set a delay from 1 second to 5 minutes before the alarm activates when you return home, allowing time to disarm it.
- "Countdown with tick tone" will make the alarm countdown with beeps when it’s about to be disarmed.
- "Volume level" adjusts the volume of your alarm tone.
- "Chimes from 32 to 58" are additional tones from "Chimes from 1 to 31."
- At the bottom of the page, you will find "Factory reset," which resets all settings and deletes your accessories.
- At the bottom, you will also find "Hub language," where you can choose the language for the settings.
Accessories Explanations
If you go back to the front page of your alarm system, under "Accessories," you will find the different sensors. Here, you can change the names of the various sensors.
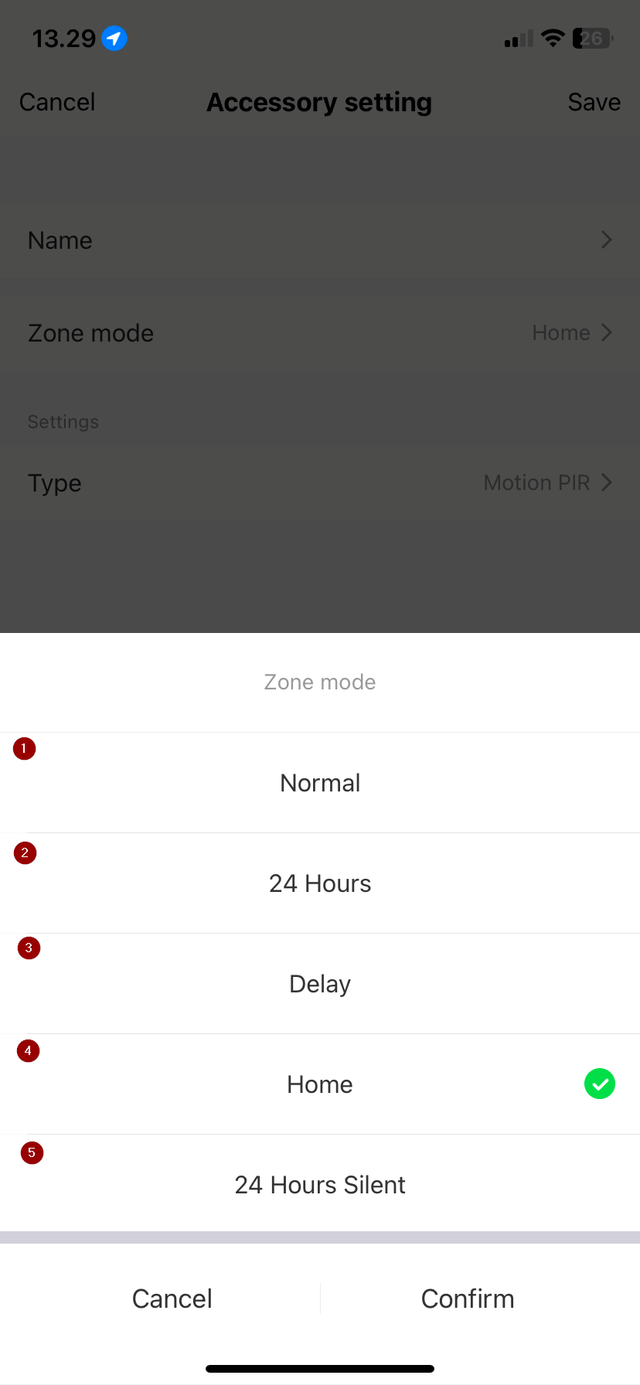
Below, you can select "Zone mode," where you can set how each specific sensor should behave.
The following zones are available:
- Normal - The sensor detects based on whether the alarm is Armed or Disarmed.
- 24 Hours - The sensor detects constantly, regardless of whether the alarm is Armed or Disarmed.
- Delay - Functions like "Normal," but the sensor will only trigger the alarm after a set delay.
- Home - The setting that controls which sensors are activated or deactivated when you set the alarm to "Home" or Normal. This Zone Mode is used to create "Perimeter Security."
- 24 Hours Silent
- - Functions like 24 Hours Zone Mode, but the sensor will only send a notification without activating the alarm or siren.
In the top right corner, click save to "Save" all your configured settings.